Search
Close this search box.

To make the perfect frame bag, we need the perfect photo.

We have an accurate digital process for printing full-scale templates to work with.

No more cardboard templates.

You will need:

  • Sheet of paper or piece of cardboard
  • Some tape
  • 8m/26′ measuring tape
  • Mirrorless, DSLR camera, or pro-level camera phone

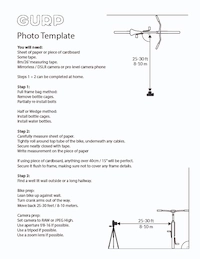
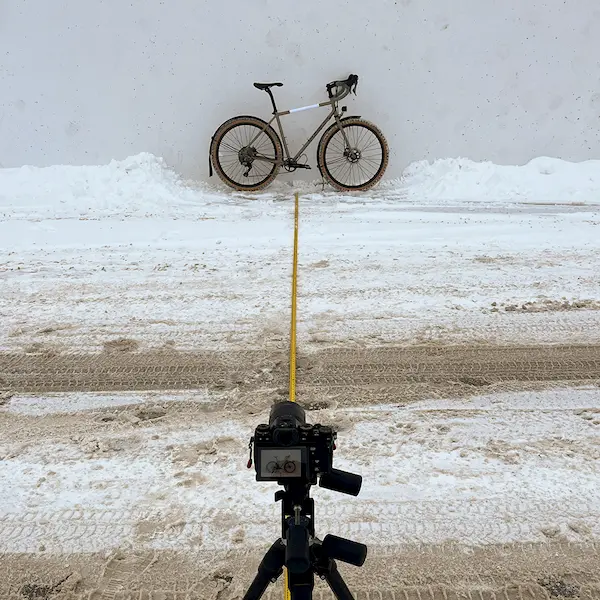
Steps 1 and 2 can be completed at home.

Step 1:

Full frame bag method:

  • Remove bottle cages.
  • Partially reinstall bolts.

Half or Wedge method:

  • Install bottle cages.
  • Install water bottles.

For half bags, we recommend the Wolf-Tooth B-Rad 2 and/or a Lowering Cage if bottles are high up. This maximizes bag space. Let us know if you plan on getting this, and we can digitally simulate it.

We like these smaller 22oz Purist bottles for half bags.

Frame Bag Photo Template Guide

Step 2:

  • Carefully measure the sheet of paper.
  • Tightly roll around the top tube of the bike, underneath any cables.
  • Secure it neatly closed with tape.
  • Write the measurement on the piece of paper.
Frame Bag Photo Template
BONUS POINTS! Include also a ruler and/or paper bill taped to the frame
Frame Bag Photo Template Guide

Step 3:

Find a well-lit wall outside or a long hallway.

Bike prep:

  • Lean your bike up against a wall.
  • Turn the crank arms out of the way.
  • Move back 25-30 feet (8-10 meters). Really.

Camera prep:

  • Set the camera to RAW or JPEG High.
  • Use aperture f/8-16 if possible.
  • Use a tripod if possible.
  • Use a zoom lens if possible.
Frame Bag Photo Template Guide

Checklist:

Super!

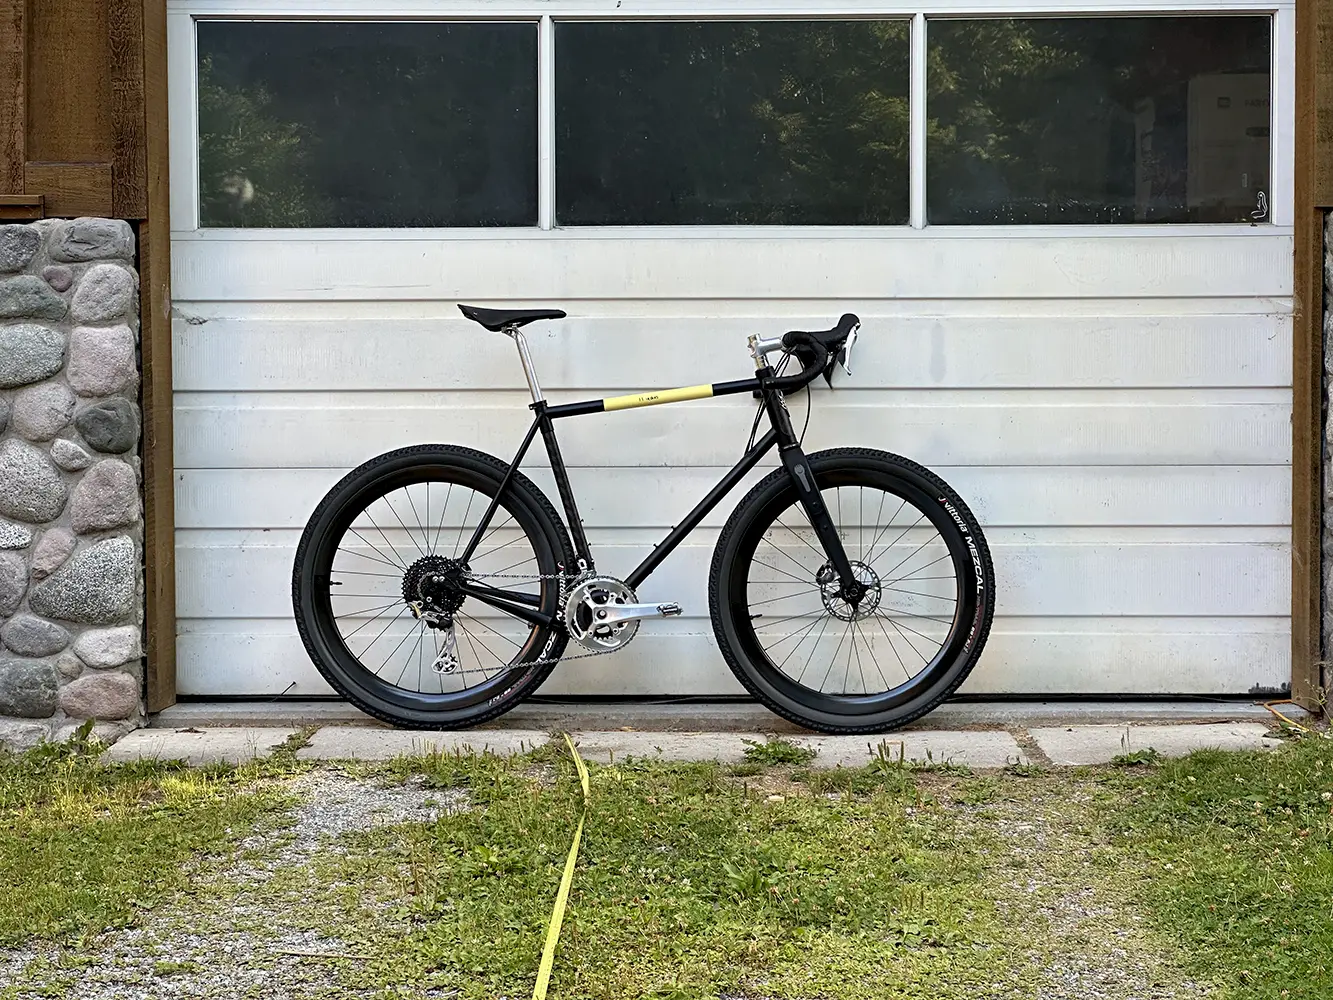
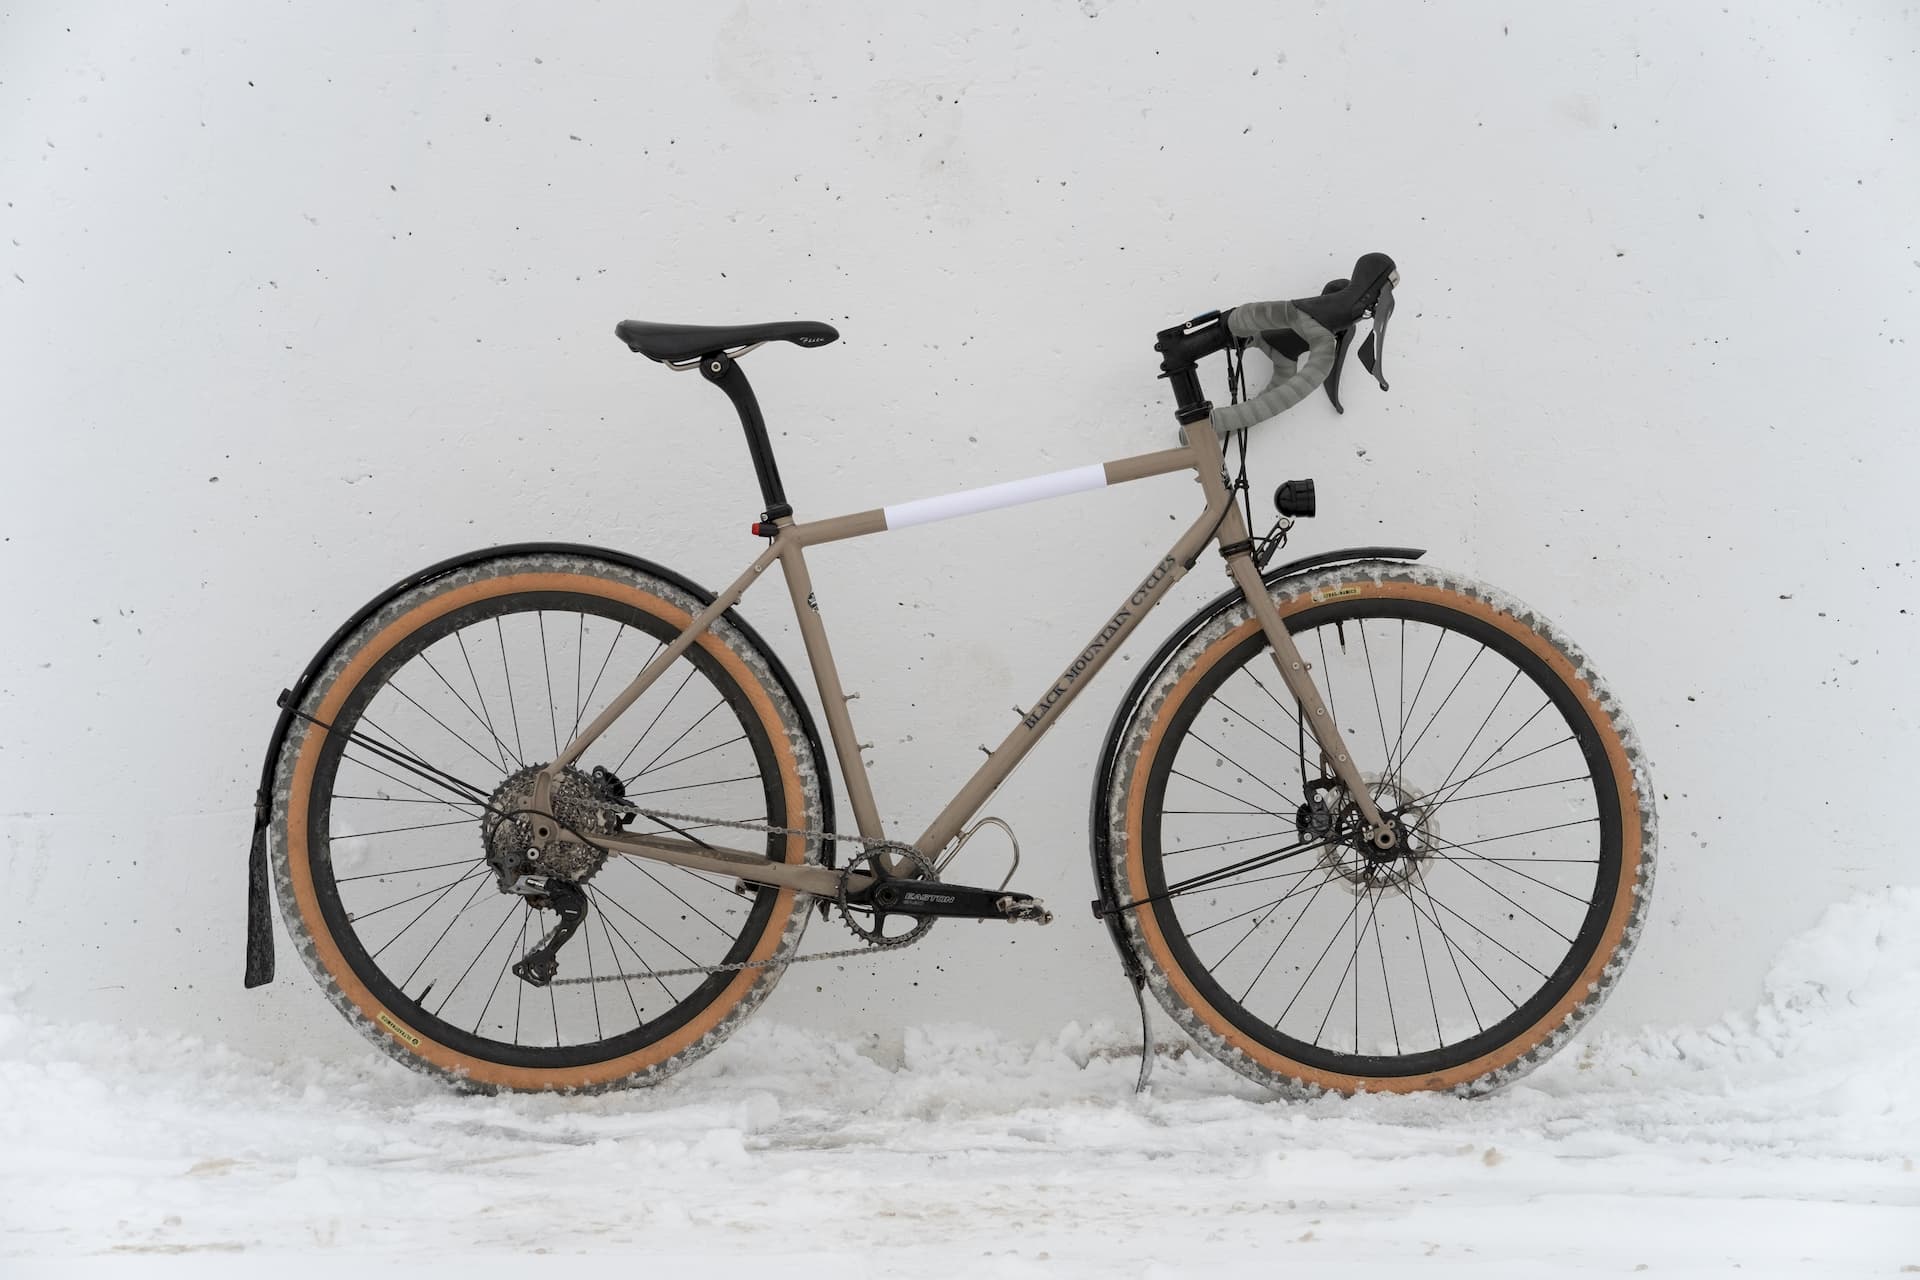
Send us your photo, along with your bikes: brand name, model, and frame size.